Monday, 23 March 2015

Pictures and Journey pages

The picture page is only half a regular page just like the 'coffee bar' page. I just used the Artbooking cartridge again to cut the background and the design over the top. My picture taking is probably not the best but it was at night and shadows seem to fall on the book. I guess it didn't help that I was tired but wanted to get the pictures taken so I could start the blog. 
I think once the pictures are on there it will be neat. I also left one as a pocket for journaling .
The size of the cuts were 5 inches for both the background and the overlay.
I might put a tab on the top of the journal card yet.
"Journey" was cut out of a Tim Holtz die called Journey. The number if you are interested is 657203. The frame was from Artbooking and the starfish,
 with the real sand on them, was cut from a die we used at a scrapbook store. Cricut doesn't have anything as nice as these on their cartridges

The little book that opens on the side for journaling was tied together with some bakers twine to keep it closed.


Just another day in Paradise and Coffee Bar pages

Had to have a page for the Coffee Bar.
Another generic page that hopefully I can use either at a beach or on board ship. I think I can make it work as long as the weather is sunny. The strip down the side is sort of velvety and purchased at the dollar store. I cut "heat wave" out of  Life is a Beach. Size escapes me but maybe it was 1 1/2 inches. I don't know why I used white ink to distress it. , Maybe to make it stand out more, "Memories " was also a cut out from Graphically Speaking. Probably 1 inch. The frame is Artbooking. I just love the variety of frames on this cartridge. The grey folder acting as a pocket was from the Project Life pack. 
This was the insert from the pocket and again from Project Life. 
I love the coffee bar on the ships. Yes, you have to pay for your delishio drink but it's well worth it. They have the most yummy cakes and confections ever. So maybe I will get a menu or just picture from them and run a list of some of the drinks I purchase there. The pocket was from half of another page I took out of the journal. Cute right? I cut the coffee cup out of  Graphically Speaking and the "Mmmmm" was also from there. I think they were cut at 4 inches. The letters in  " Coffee Bar" were all cut out separately. The font is in Life Is a Beach and cut at 1 inch. The picture frame at the bottom is just one frame from the film strip. The pocket is big so hopefully it will hold my menu and maybe even a picture. 

My story and Serenity pages

My two pages together.
This page wasn't designated for anything in particular. I know I'm going to need some pages for pictures that I didn't count on or adventures I didn't know I would be taking. Again I used a film strip but I think it was from Mickey and Friends. There a couple of cartridges with strips like this on them. I cut this out a long time ago because I wanted to see what it looked like. I do that sometimes and then just put them in a drawer marked Cricut die cuts. Now I know to put the size on the backside of the cuts.
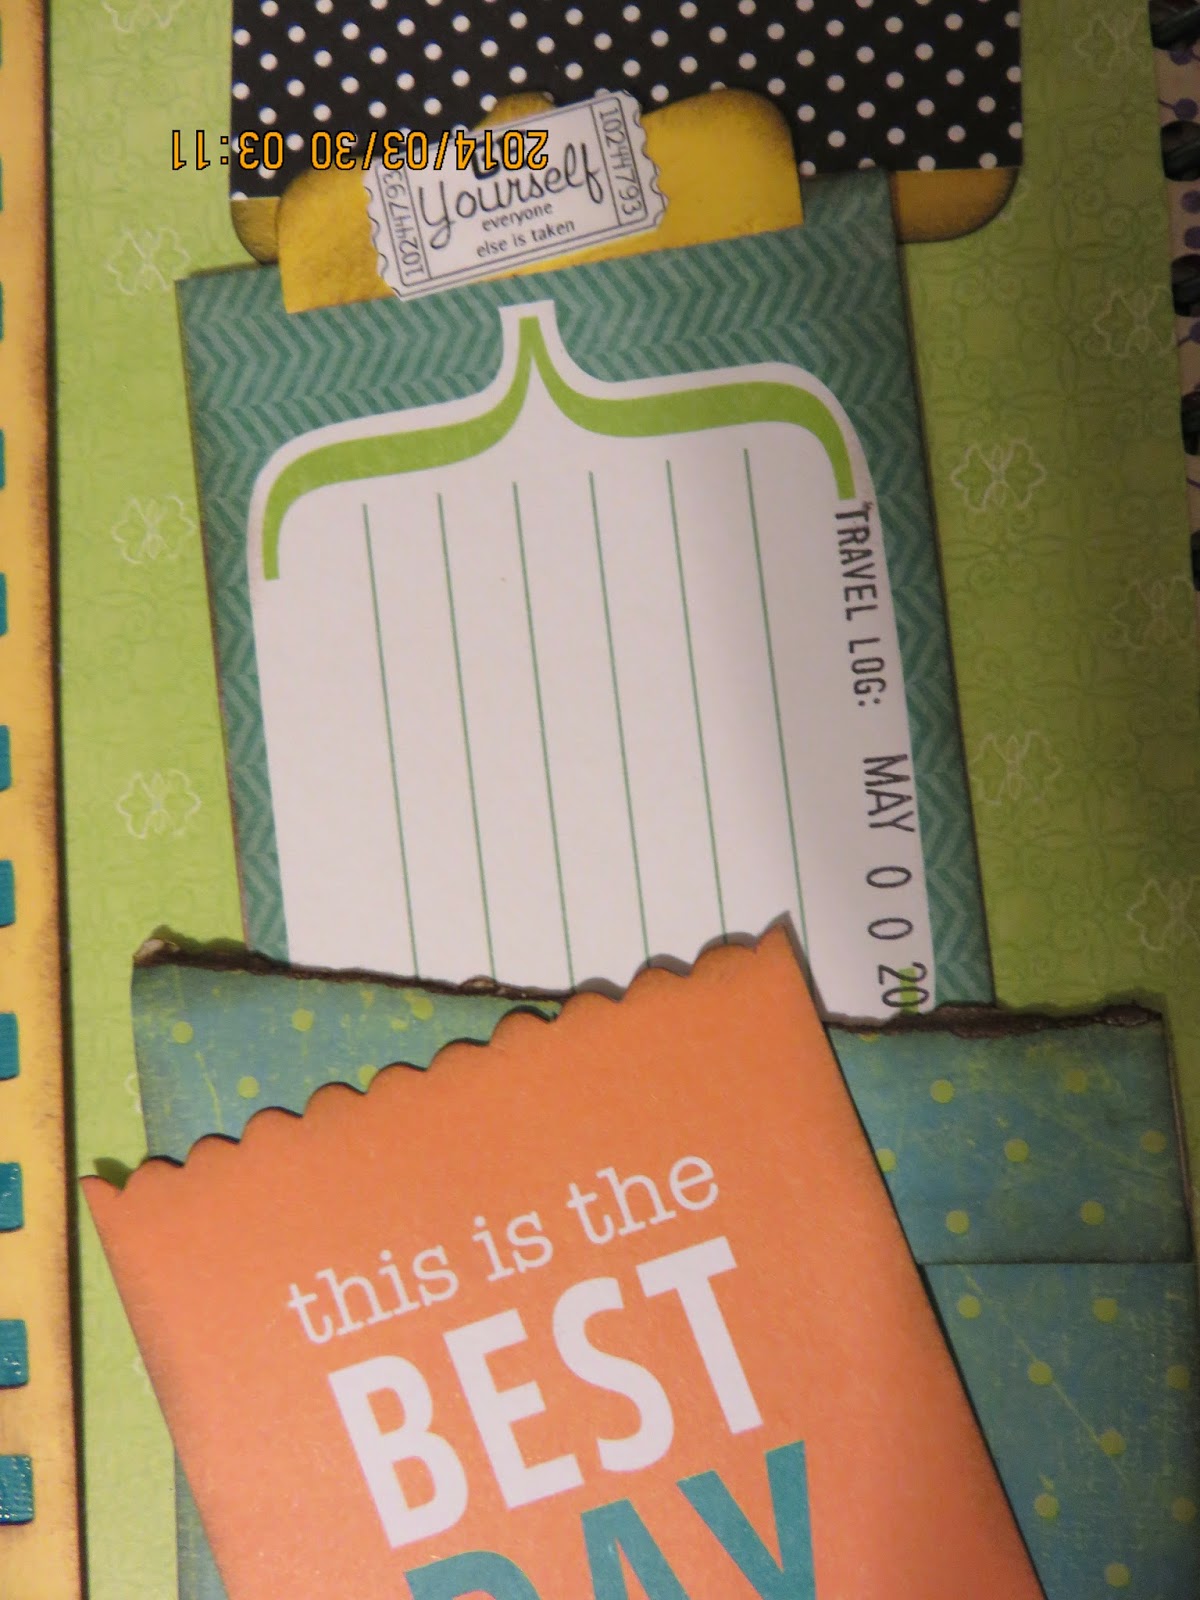
 The fish are the same issue.I sparkled up some of the fins and tails. No size but the cartridge is Life is a Beach. It could be 3 1/2 inches. I found a lot of the time I had to make various cuts until I stumbled upon the right size for my project. Scrap or ugly paper is ideal for that. Sorry, I digress. The 'My Story' in the top right corner was again made by me. Just yellow cardstock, black with white polka dot paper with a border of stick on  daisy like flowers. I might have got then at the dollar store also." Best day ever"is from a pack of cards that I got especially for Smashbook. The pocket was just scrap paper and it was torn on the top edge and everything distressed again. The journal card just says travel log and I stamped the date on it.

The Serenity page was inspired from the Serenity deck on the ship we are cruising on. It's all in turquoise and teak wood. No children. At my age, that's a bonus on a cruise. 


Again my frames are from Artbooking. The word serenity was cut from Life is a Beach. I have 5 inches written down so I'm hoping that is right. The seahorses were also cut out from Life is a Beach. They were cut from sparkle paper but I don't have a size. My ruler measures them at 2 1/4 inches.
The journaling will go behind the pictures once they are permanently in the book. I added some real sand to the coral under the word Serenity. It's lovely sand and I always have some in a little jar on my shelves for just this kind of thing. 

Escape and Explore pages

This is how the pages look together.
The escape page was made with the idea of multiple pictures and journaling. 
I cut the film strip out of Artbooking
at 11 1/2 inches. I know, it looks like it would be too large. It wasn't. I just have to make sure I can fit pictures in the squares. The large black and turquoise frame was from Artbooking and cut at either 5, 7 or 9 inches. It's on page 64. I used various sizes though out the book. 
The picture of the lady in the bottom left corner was cut from a piece of card stock put out by Graphic 45. I had other intentions for this paper but it worked well in this book so I'm glad I used it. The pink strip along the top of the pocket was stamped with from the same set as My Story from Fancy Pants. You could stamp anything across there. I used another E.K Success punch along the bottom and glued a piece of grey ribbon long the top side. Again I made the pocket large enough for pamphlets or brochures or more pictures. 

Another frame from Artbooking. The little envelope in the corner was something else in my stash that has been there for years. World traveler was a peel and stick from a company called Stickabilities. The Island adventure is another cut out from Graphic 45. I went through my stash of stamps and found all kinds of sayings and words that I used on the frames. I also only tacked my frames down with a little tape from a tape runner. I'm hoping it holds them in place, then can be removed to put pictures in, then I can glue them down permanently. What some of the scrappers in our circle have noticed is, the tape, even the big tape runners, dry out and a lot of my scrap books now have to be redone as all the pictures and embellishments are falling off the pages. I now glue things down. I'm not all about the acid free anymore. Chances are my kids won't really want the books anyway so no need for me to make sure they will last a century. lol 

Set sail and flight info pages

These are the next two pages together so you can see the look when the pages are open. I tried to keep most of the pages, that are side by side color coordinated or at least so they compliment each other.
 My set sail page will either be a picture of another ship leaving harbor or the harbor as we sail away. The picture frame was from Artbooking, cut at 10.40. I know this seems really large but for some reason the sizing didn't make sense on some of the cuts. The frame and around the page, which is the side of the half circle, was distressed with walnut stain. I cut "notes" out of the Artbooking cartridge and I'm thinking it was at 3/4 inch.
T
This page has my flight info on it. Time of flight and seat selection. Probably too much info but I wanted it in there anyway. I also had my itinerary in the pink book in the top left corner. I made the pocket big enough to hold some other journaling cards in case I had other things I wanted to say. Again, I could use cards and put pictures on the back of them. The little two page booklets are from one of the sets from Project Life. My sister and I each bought a box when they had a buy one at full price and get the second half price at Michael's. We then went through both boxes, and you get a ton in a box, and separated them so that any doubles we had we shared. It worked out great. The stamp of the palm tree is from a set that I don't have a name for. When I first started to scrapbook and collect stamps, I didn't always keep the original packaging so my early stamps are a mystery as far as the manufacturer goes.
The little plane is off one of the dollar store things again. I stamped Depart and Leave on the front of the pink card. I also distressed all of the paper and tags with walnut stain. I was going to do this for all the paper in the book but soon realized that I had glued some things down without the distressing so it was hit and miss. As you may have noticed I have two pockets on this page. One large one that looks like newsprint and smaller pink on the front of it. The brown journal cards have prompts on them and some of them I added the tabs and stamped PULL on it so people would know it's interactive.

Pages 2 and 3 of my Hawaii journal


I bought some brown envelopes from Staples and used one on the inside of the title page. I used some glimmer mists on it. I really liked the idea of the envelopes and I bought the glimmer mists ages ago to do some art journaling but never got around to it. So I misted the envelope and it still didn't look good until I took some of the front off and  added the blue cardstock which I had stamped with the word stamp from Stampin' Up. I used Tim Holtz distress ink, walnut stain, all around all the paper on the page. I also used a rusty/red piece of card stock to cover the inside of the cover page before I put anything on it. The leaves are something I've had in my stash forever and decided I just wanted to use them up. The"Smooth Sailing" was cut with the Cricut from the Life's a Beach cartridge and it was cut at 3 1/2 inches. I 'm not sure what the background of the ship was cut at or even the cartridge but there are lots of cuts that are similar in shape, in the Cricut cartridges. If I had to make a guess I would say it was cut at 4 inches.  I wanted the pocket at the front to be deep so that I could put brochures from the cruise ship inside it. I could also put pictures on the inside of the pocket. 

Page 3 is just a half circle so I just cut out "Hawaii" with the Cricut and put that on some green background paper and that was done. It was in the Life's a Beach cartridge and cut at 3 1/2 inches. I used Life's a Beach quite a bit for this project. If you have a Cricut and wondering what cartridges you might use a lot, I found that the new ones from Close to my Heart are excellent and they were well used for this project. Artbooking  was used for most of my picture frames in the book. I love that cartridge. I don't sell Close to My Heart so have no vested interested in telling you this. They are just awesome cartridges and come with stamps to match. You can't beat these for art journals or smash books. 

Hawaii travel book with my Recollections Journal

It's been a while since I last posted on my blog but wanted to post about my photo journal, smash book or scrapbook. Not sure what you would call it but to me it's a scrapbook.
I'm hoping to post about how I created each page and some of the elements I used. I bought a Recollections Journaling book, on sale, from Michaels. Most of the pages in the book needed to be covered with other scrap paper as the designs, for the most part, were not pretty. Now my book is twice as thick as when I started as there is at least two pieces of paper covering each of the original pages. If you decide to do one of these, or even a Smash book, I advise to keep the stuff inside to a minimum. I learned the hard way that too many sheets of paper and embellishments can make the books too thick and they won't close properly.
After searching the web for some ideas of how to get started on my book, I found no examples of the Recollections books. I guess they weren't as popular as the Smash books so people weren't buying or at least not posting them. This was the driving force for me to put mine online in case someone out there loved some of my pages and needed some inspiration. So my book is about my upcoming cruise to Hawaii. Yes, I said upcoming, as we haven't gone yet but my book is all finished. I decided I had a better chance of finishing a travel journal, and actually journaling in it, if I did it before the trip and I just had to add pictures and of course the commentary. This was not an easy task and I'm not even sure it will work. I guess we will see at the end of the vacation.
So my first page was my cover page. I should have taken a picture of the books pages before I put anything on them but I didn't.
I decided to embellish the cover page a bit and add some sparkle to the flowers and a title. I cut out the pink piece and used an EK Success punch to trim the edge. The little sayings throughout the book are from various sources but because I took most of them out of the original packaging, I don't know if I can help you with the names of the companies. If you have any questions, don't hesitate to ask and if I can help with sizes or souces, I most definitely will.
The blue My Story tag was made by me. I just used the My Story stamp from a set that came in a 12 x 12 package. I stamped the journaling lines on it and added a butterfly. The little words, BonVoyage, Passport and tourist were from a package of stickers I got from the dollar store. I used quite a bit of stuff from the dollar store. I love that they have so many of these packages to choose from  The little saying in the top left corner says, Every step of the journey is the journey. The cover page was easy and fast. Hope you enjoy the rest of the book.